First aid is extremely important in emergency situations with pets. First aid is required to ease pain and prevent further injury until professional veterinary care can be obtained. Our pets (and our neighbours’ pets) are just as excited about the nice weather as we are, and they may become a bit more adventurous this season. Wildlife is also more active and potentially more aggressive if there are babies near by. There is more traffic on the road, more yard work on the go and spring cleaning is well underway. This time of the year is beautiful and also presents some dangers including wildlife, traffic, sharp tools, scary noises and garbage to get into! It is important to be prepared in case your pet, or a pet you come across, has become injured. The following information is only a sample of the kinds of things we should know as pet owners and lovers. Pet first aid training covers all of this and so much more, and we highly encourage all pet owners to invest in formal training.
Emergency Approach
In an emergency situation, your first priority needs to be safety! If you are put in danger or injured, you are of no help to the pet and you also may require medical attention. Ensure you are safe before attempting to administer first aid.
Animals need to be restrained before administering first aid as injured or scared animals can be unpredictable or dangerous.
You need to stay calm and focused in order to provide the best care for an injured animal. You also should get help. Another person can restrain the animal or provide transportation to a veterinarian.
Assess the condition of the animal and prioritize what needs attention first. Tend to the most threatening issue first.
Check if the animal is responsive to voice and touch. Check respiration and pulse.
Your goal is to stabilize the animal and transport to a veterinary clinic.
Vital Signs
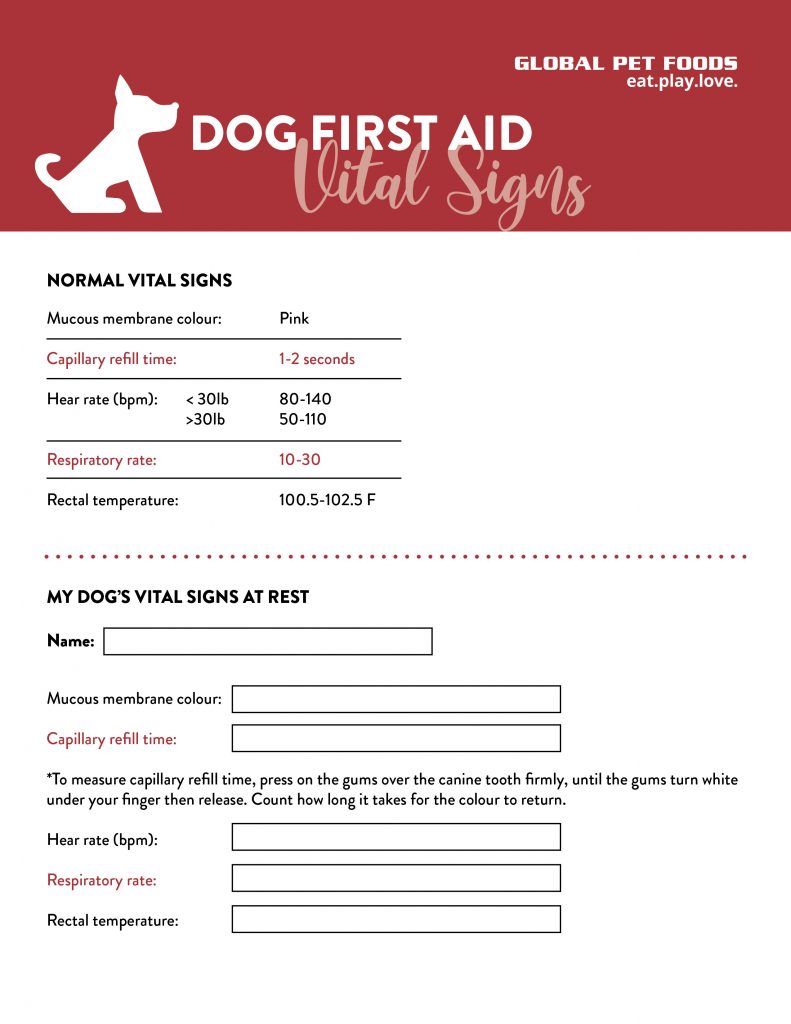
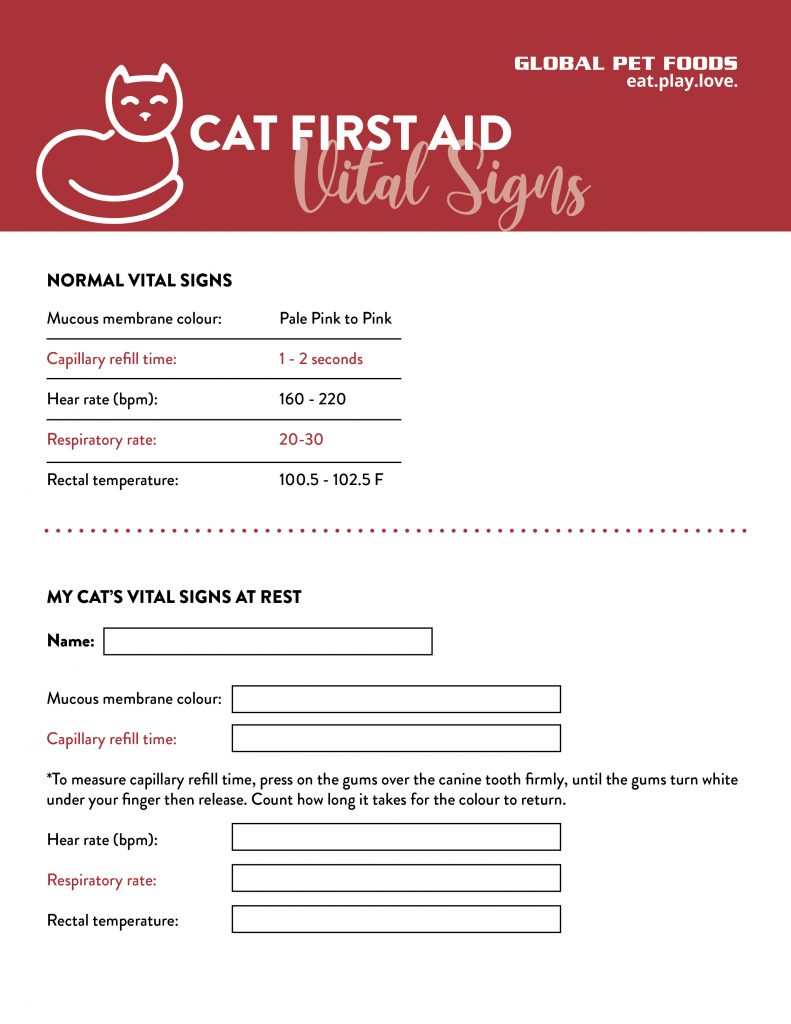
Checking and recording vital signs is an important indicator of the severity of an animal’s condition and can be a valuable tool for the veterinarian. It is also extremely helpful to record your pet’s normal vital signs at rest so you are able to identify changes in these vital signs, which would indicate injury or illness.
To check pulse, place your hand on the animal’s chest behind its elbow to feel the heartbeat, or place fingers on the inside of the back leg where it joins the body to feel the pulse in the femoral artery. Do not use your thumb to find the pulse. Count beats per minute.
Respirations can be checked visibly by watching for chest movements or holding a hand or tissue in front of the nose to feel or see breaths or by placing a hand on the animal’s chest to feel for movement. Count breaths per minute.
Check the mucous membrane colour by looking at the gums, and measure capillary refill time by pressing a finger firmly onto the gums above the canine tooth until the gums turn white under your finger and then release, counting the time it takes for colour to return.
Use the forms below to record your pet’s normal vital signs as a baseline reference.


Shock
Shock occurs when there is not enough oxygen circulating to meet the needs of vital organs.
Signs of shock:
- Pale gums and lips
- Poor capillary circulation
- Weak and rapid pulse
- Rapid, shallow, irregular respirations
- Dilated pupils
- Cold skin and legs
- Weakness
- Dizziness
- Collapse, unconsciousness
Remember to always restrain an animal before attempting first aid. If an animal appears to be in shock, handle gently and keep the animal quiet. First control any bleeding and then check the airway, breathing and circulation. Keep the animal warm and transport immediately to a veterinarian. Do not give the animal anything to eat or drink.
Bleeding
Bleeding from minor cuts will stop within a few minutes. Severe bleeding requires immediate first aid as it can lead to shock and eventually death.
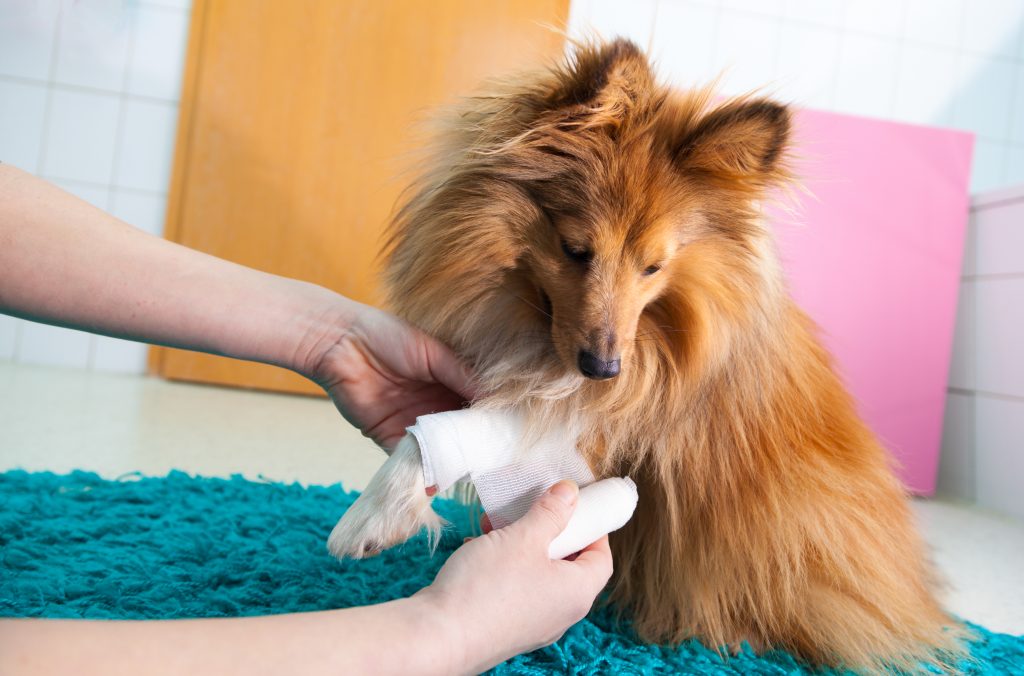
Restrain the animal first. Cover the wound with clean gauze and secure with a bandage. Reinforce dressing as needed if bleeding continues. Transport to a veterinarian.
Injuries
There are many types of injuries and the action you take will vary depending on what type of injury the animal has sustained. Always transport to a veterinarian once the animal is stabilized.
If an animal has a broken bone, first control any bleeding, move the animal as little as possible and support the animal during transportation. If splinting a broken limb, do not attempt to bend the limb; splint in the position found.
In the case of an injury directly to the eyeball, use a cold compress and do not apply direct pressure.
For minor burns, apply a cold compress or submerge in water and apply sterile dressing and bandage. If burns are severe, transport immediately to a veterinarian and monitor vital signs.
Foreign objects
Common foreign object injuries this time of year include porcupine quills, fishhooks and grass seed.
Porcupine quills can be removed without sedation if there are only a few; grasp the quill close to the skin with needle nose pliers and slowly pull straight out. If there are many quills or they are inside the mouth or near the eyes, they should be removed by a veterinarian.
To remove a fishhook when the barbed portion has not penetrated the skin, simply withdraw the hook from the skin. If the barb has penetrated the skin, push the hook forward until the barb sticks out. Cut the shank of the hook and remove it.
Many pet owners are unaware that grass seeds can become lodged in an animal’s nose, ears, feet, between toes or in the throat. If the object is visible, try removing it gently. Do not use tools in an animal’s nose or throat. If they cannot be removed, contact a veterinarian.
Choking
If an animal is having difficulty breathing, is gagging, rubbing their face on the ground or pawing at their mouth, they may be choking. Restrain the animal, open the mouth and pull the tongue forward to inspect the throat. If the object is visible, grasp it with your fingers and remove it. If this is not possible, a version of a Heimlich maneuver can be performed.
For small pets, place them against your stomach with their head up and feet hanging down. Put your first two fingers in the hollow space just below the rib cage and push inward toward your belly and upwards towards your chin at the same time.
For large pets, lay them on their side on the floor and kneel behind them, with your knees touching their back. Lean over them and place your closed fist in the hollow below the rib cage and press sharply upward and inward towards their head and your knees.
These maneuvers should only be done in severe emergency situations and your pet will require veterinary attention even after the object has been removed.
Always be conscious of potential dangers in your pet’s environment!
*The information provided here is intended as a guide only and does not replace formal first aid training.
It is important for at least one person in your household to have pet first aid training. If you experience a pet emergency, always phone your veterinarian or animal emergency clinic so they can give you guidance and/or prepare for your arrival.
Prevention of illness and injury is the primary objective of all pet owners and animal lovers. Pet first aid courses provide training that is essential for prevention in addition to emergency first aid training. We encourage all pet owners to receive animal first aid training.


